Removing the HDD
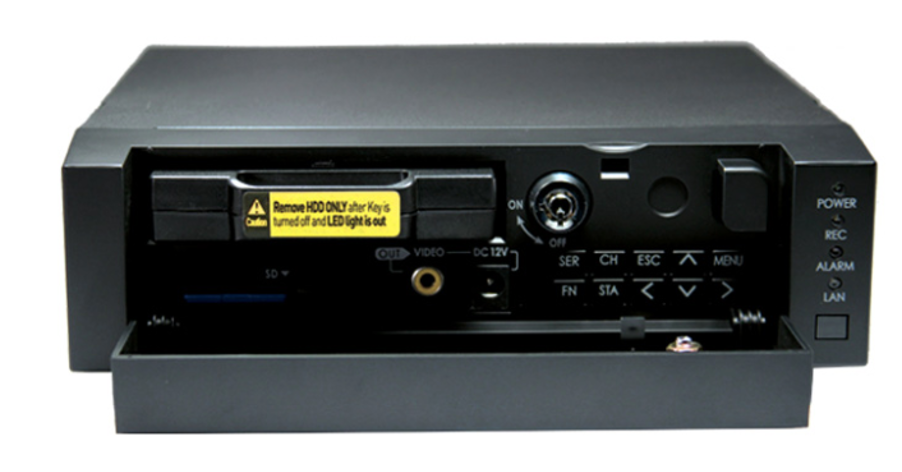
In order to remove the HDD Cartridge, the Key Lock must be turned to OFF with no LED lights showing – turning to OFF will initiate shut down and will fully power off in 15 seconds. When the Key Lock is ON, the removable cartridge cannot be inserted or pulled out.
Please see the image below showing the front of the DVR after the cover has been unlocked.
Viewing the Footage
DVR footage can be viewed in the Smart Witness PC Viewer Software program supplied with the unit or downloaded here.
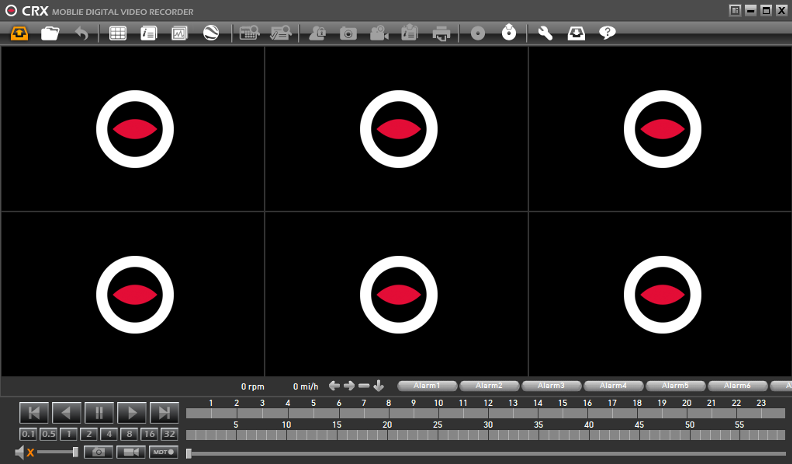
When opening the software, the main screen below will appear, showing the control bar along with the video playback screens, signal and alarm display bar and playback control at the bottom.
Connect the HDD cartridge to your PC using the SATA to USB adaptor provided with the DVR.
After connecting, click the  icon from the tool bar to see the below screen.
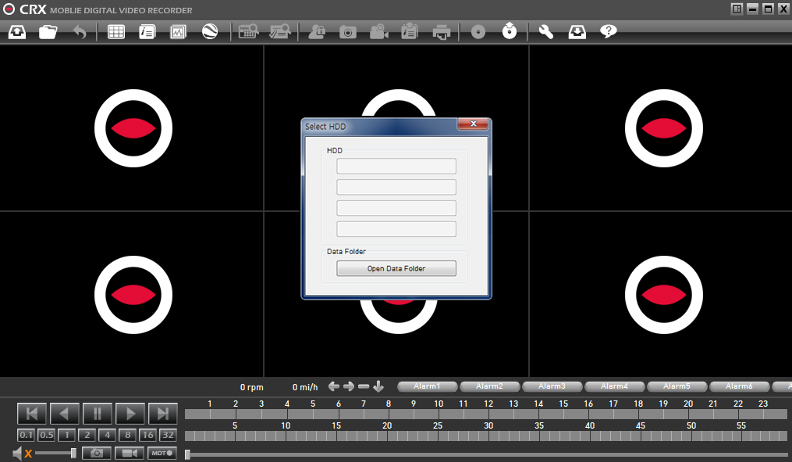
Select the HDD you wish to access from the options given. The Calendar Search window will then pop up.
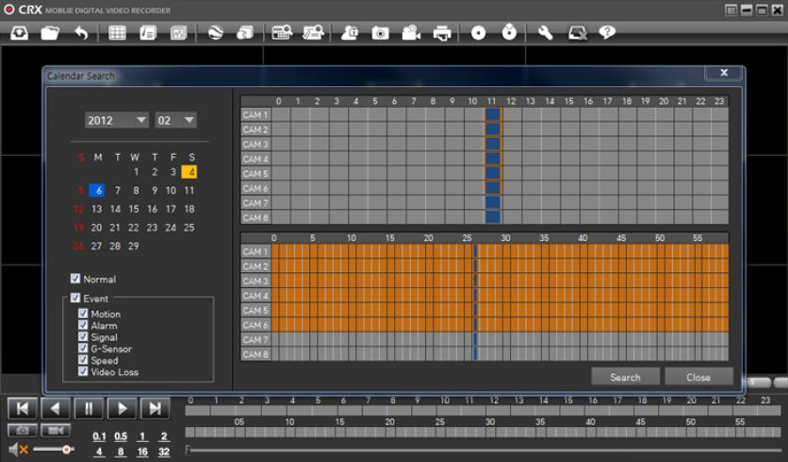
Select the date you wish to check – the chosen date will be highlighted in yellow. The list in the bottom left corner can be used to filter through different events.
When a date is selected, the hours (from 0 – 24) with recorded data will be highlighted in orange, for each camera and when the hour is selected, the minutes (from 0 – 60) with recorded data will be highlighted in orange, for each camera. Choose the minute you wish to start your search. The selected hour and minutes will be highlighted in blue.
Click ‘Search’ in the bottom right corner to access the recorded data.
Playback can be operated using the control buttons (On the left hand side of the screen). You can jump to different times by sliding the time slide bar (right hand side of the screen) for precise changes.
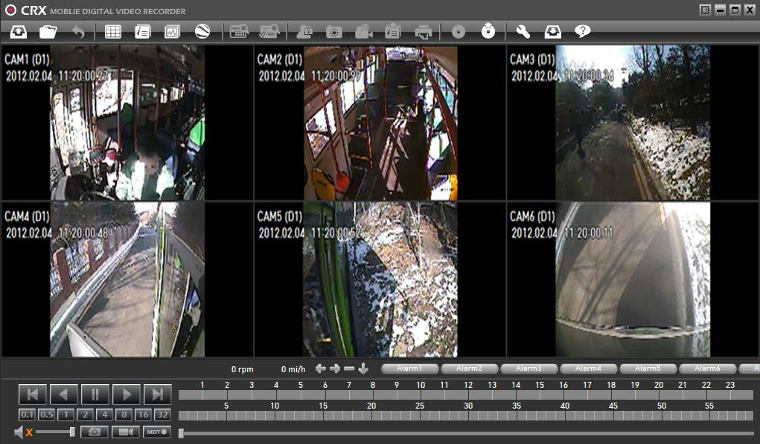
You can change the data by clicking the calendar search button  on the tool bar. This will take you back to the initial search screen.
Downloading the Footage
From the PC Viewer Software, you are able to convert the footage into an AVI file. When viewing the video playback, pause the video at the point where you wish to start saving and click the Save AVI button  . This will open the below window.
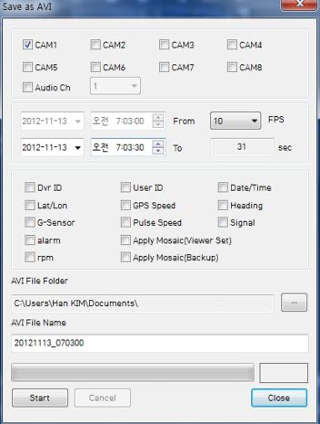
- Select the cameras you wish to download.
- If you wish to include audio, check the ‘Audio Ch’ box and select the channel you wish to include from the dropdown menu. (NB: Multiple video channels can be converted but only one audio channel can be That one audio channel will be included in all AVI conversions)
- Select the time period you wish to convert (up to a maximum of 1 hour).
- The starting time will be automatically set to the time you paused the video at the start of this process and cannot be changed manually. To change this time, you will need to go back to viewing the video footage and pause at the correct start time.
- Select the frame rate (FPS), from 1 to 30. For the most natural video stream use 30 FPS.
- Select any additional information you wish to include in the video from the tick boxes available. This information will show up as text on the video.
- Choose the folder you wish to save the AVI file in and type a file name.
- Select ‘Start’. A video of each camera will be made into an AVI file and downloaded to the folder selected in step 6.